Campaign templates are a great way to get your marketing campaign up and running quickly.
Create a workflow from a template
To create a workflow from a template:
- From WP Admin, navigate to Send.

This opens Send.
- In the Send panel, click the Workflows tab.

- In the Use a template box, click Start with a template.

The available templates appear in the right pane, along with several options to filter the template choices.
- Find the template you would like to use and click Edit this workflow.

- Give the workflow a name and click Use workflow.
The campaign steps appear on screen. The following are the possible steps a template may contain. Not all templates contain all these steps.- Trigger: The condition that will activate the campaign. This usually means sending a message to the customer. See Trigger conditions below.
Email: The message sent to the customer. - Waiting time: Some campaigns contain multiple steps. Waiting time defines how long it should be between steps. For example, a campaign can send an email congratulating a customer for putting items in a cart and then two days later send a reminder email if the cart was abandoned.
- Splitter Split: A fork where the campaign can take two different directions. For example, one message could be sent to customers who purchased over $100 worth of items and different message to those who purchased under $100.
This will take you to the edit screen. The edit screen displays the workflow rules.
- Trigger: The condition that will activate the campaign. This usually means sending a message to the customer. See Trigger conditions below.
- (Optional) Click the edit icon
 to the right of a rule to edit it.
This brings up the rule edit screen.
- Change a rule to fit your campaign. For example, you can have a message sent to all customers when their cart amount exceeds $300 worth of products.
Optional: Click + Add contact filter to add a contact filter to linit the workflow to specific contacts.
- Click Save Trigger.

- (Optional) Click the edit icon in the Email field to edit the message sent to the customers. You can edit:

- Subject line: A brief summary of the message content.
- Preview text: The first text customers will see. By default, it is the beginning of the full message.
- Sender name: Who the message is coming from.
- Sender email: Return address of the email.
- Content: Create the email that will be sent to the customer. Click Choose template to create the email. For details, see Create an email for your campaign.

- Click Save email.

- (Optional) Click the plus sign to add more messages and rules, or click the pencil to edit existing rules.
- To save your campaign, click Save draft.
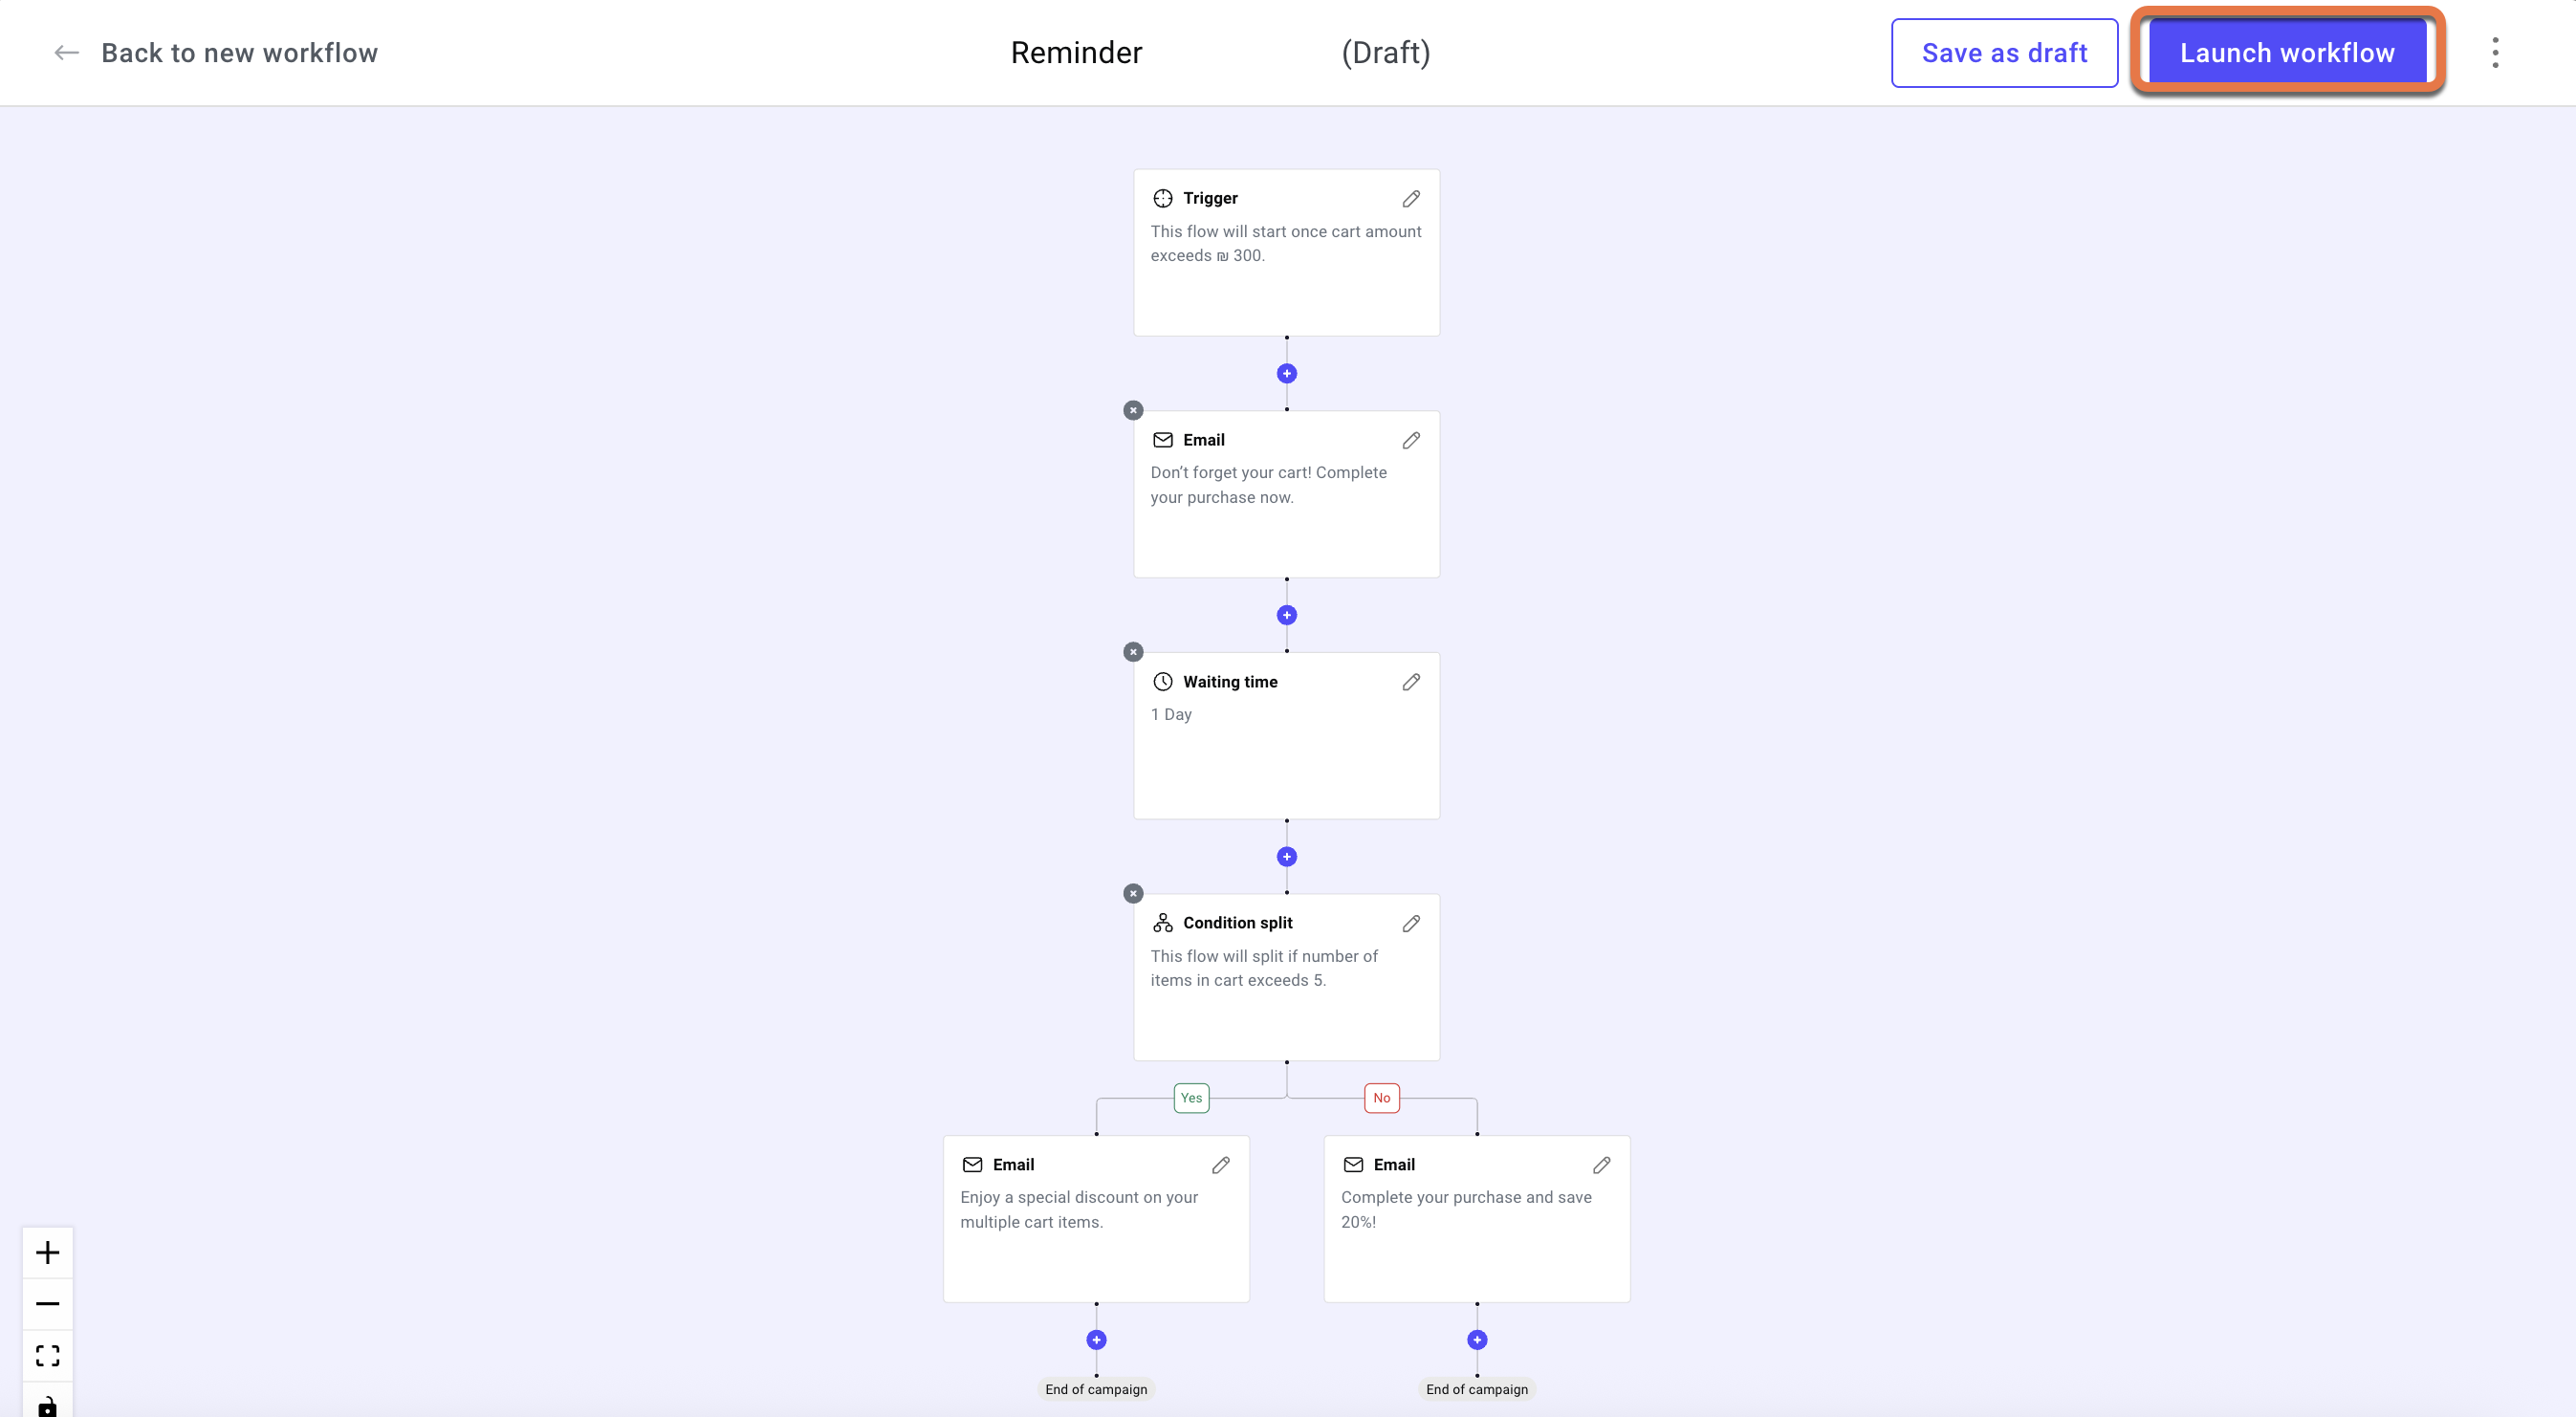
- To start the workflow, click Launch workflow.
The workflow begins.
Note: You cannot edit a workflow once it has been published.
For a complete list of trigger conditions, see Set a trigger condition.