For web development professionals, understanding and utilizing these hooks is an essential skill. They provide the power to transform generic notifications into highly-customized, branded, and effective communication tools without altering the core plugin files. This guide will provide a comprehensive overview of WooCommerce email hooks, from simple content additions to complex conditional logic. We’ll explore both action and filter hooks, complete with practical, real-world examples you can implement in your projects today.
What Are WooCommerce Hooks?
Before diving into the specifics of email hooks, it’s important to understand the concept of hooks in the WordPress and WooCommerce ecosystem. Hooks are specific points in the code where developers can “hook” in their own custom functions to add or modify functionality. This is the foundation of WordPress’s flexibility, allowing for extensive customization without editing core files, which is a critical best practice.
There are two main types of hooks:
- Action Hooks: These allow you to do something at a specific point. When it comes to emails, you use action hooks to add new content, such as a promotional banner, care instructions, or a personalized thank-you message. The function you write for an action hook doesn’t return a value; it simply executes.
- Filter Hooks: These allow you to change something. Filter hooks are used to modify existing data before it’s displayed or used. For emails, this could mean changing the subject line, adding a recipient, or altering the CSS styles. A function hooked to a filter always accepts a variable, modifies it, and then must return it.
woocommerce_email_header
You have received an order from John Doe. The order is as follows:
woocommerce_email_order_details
woocommerce_email_before_order_table
Order #19950 (July 28, 2025)
| Product | Quantity | Price |
|---|---|---|
Simple Product
woocommerce_order_item_meta_start
($item_id, $item, $order, $plain_text)
woocommerce_order_item_meta_end
($item_id, $item, $order, $plain_text)
|
1 | $180.49 |
| Subtotal: | $180.49 | |
| Shipping: | Free Shipping | |
| Tax: | $41.51 | |
| Payment Method: | Direct Bank Transfer | |
| Total: | $222.00 | |
woocommerce_email_after_order_table
woocommerce_email_order_meta
woocommerce_email_customer_details
Billing address
John Doe123 Market St.
San Francisco, CA 94103
Shipping address
John Doe123 Market St.
San Francisco, CA 94103
woocommerce_email_footer
A Better Way: Why Professionals Choose Send by Elementor
Before diving into the technical details of hooks, consider the modern alternative. While hooks are a developer’s tool for making specific modifications, Send by Elementor is a complete communication toolkit designed for web creators to deliver business results.
Instead of writing PHP snippets for each customization, Send provides a visual, no-code builder that allows you to redesign all your WooCommerce emails with a simple drag-and-drop interface. This dramatically speeds up development and makes the process more intuitive.
More importantly, Send goes beyond basic email styling. It’s a fully integrated platform for:
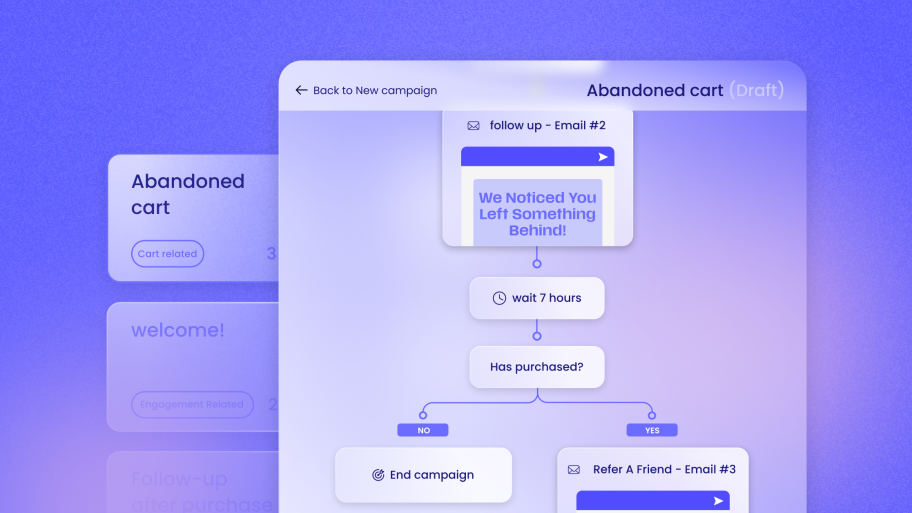
- Email & SMS Automation: Create powerful workflows like abandoned cart reminders, welcome series, and post-purchase follow-ups directly within WordPress.
- Boosting Client Value: Help your clients increase sales and customer retention with professional marketing tools.
- Unlocking Recurring Revenue: Offer email marketing and automation as a managed service, creating long-term partnerships and sustainable income for your business.
For web professionals looking to provide maximum value with minimum complexity, Send by Elementor is the superior choice. It empowers you to achieve more than what’s possible with hooks, in a fraction of the time.
Getting Started: How to Safely Add Custom Code
To use WooCommerce email hooks, you need a safe and reliable place to add your PHP code snippets. Directly editing your theme’s functions.php file is risky, as any updates to the theme will overwrite your changes. Here are the two recommended methods for adding custom code.
Method 1: Use a Child Theme (Recommended)
A child theme inherits the look, feel, and functionality of another theme, the “parent theme.” It’s the industry-standard way to modify a WordPress theme. You can add your custom code to the functions.php file of your child theme, and it will remain untouched when the parent theme is updated.
If you don’t already have a child theme set up, you can easily create one. Many theme developers provide one, or you can use a plugin to generate it. Once activated, you can access its functions.php file by navigating to Appearance > Theme File Editor in your WordPress dashboard and selecting your child theme.
Method 2: Use a Code Snippets Plugin
For those who prefer to keep customizations separate from the theme, a code snippets plugin is an excellent alternative. These plugins provide a user-friendly interface for adding, managing, and organizing your PHP snippets directly from the WordPress dashboard. This method avoids the need to interact with theme files directly and makes it easy to activate or deactivate specific snippets as needed. A popular and reliable choice is the “Code Snippets” plugin.
For the remainder of this guide, the provided code examples can be placed in either your child theme’s functions.php file or a code snippets plugin.
Action Hooks: Adding Custom Content to Emails
Action hooks are your tool for injecting new elements and information into your WooCommerce emails. Let’s explore the most useful action hooks, categorized by their location in the email template.
Most of the functions you’ll hook into these actions will accept up to four arguments:
$order: TheWC_Orderobject, which contains all the information about the order.$sent_to_admin: A boolean (trueorfalse) that indicates if the email is being sent to the store admin.$plain_text: A boolean that indicates if the email is the plain text version.$email: TheWC_Emailobject itself, which can be useful for accessing email-specific properties.
Global Email Hooks (Affect All Emails)
These hooks allow you to add content to the header and footer of every single WooCommerce email, making them perfect for consistent branding.
woocommerce_email_header
This hook fires right after the opening <head> and <body> tags of the email template. It’s ideal for adding a custom logo or a branded banner image.
Example: Add a Custom Header Banner
add_action( 'woocommerce_email_header', 'add_custom_email_header_banner', 10, 2 );

function add_custom_email_header_banner( $email_heading, $email ) {
    // Don't add the banner to plain text emails
    if ( $email->is_plain_text() ) {
        return;
    }

    // URL to your banner image
    $banner_url = 'https://yourstore.com/path/to/your/email-banner.jpg';

    echo '<div style="text-align:center; margin-bottom: 20px;">';
    echo '<img src="' . esc_url( $banner_url ) . '" alt="' . get_bloginfo( 'name' ) . '" style="width:100%; max-width:600px; height:auto;" />';
    echo '</div>';
}
woocommerce_email_footer
This hook fires just before the closing </body> tag, making it the perfect place for social media links, a link to your return policy, or other important footer information.
Example: Add Social Media Links to the Footer
add_action( 'woocommerce_email_footer', 'add_social_links_to_email_footer', 10, 1 );

function add_social_links_to_email_footer( $email ) {
    // Don't add to plain text emails
    if ( $email->is_plain_text() ) {
        echo "\n\nFollow us on Facebook: https://facebook.com/your-page\nFollow us on Instagram: https://instagram.com/your-page";
        return;
    }
    ?>
    <div style="text-align: center; padding-top: 20px; border-top: 1px solid #E0E0E0; margin-top: 20px;">
        <p style="margin:0 0 10px 0;">Follow Us!</p>
        <a href="https://facebook.com/your-page" style="margin: 0 5px;"><img src="https://path.to/facebook-icon.png" width="32" height="32" alt="Facebook"></a>
        <a href="https://instagram.com/your-page" style="margin: 0 5px;"><img src="https://path.to/instagram-icon.png" width="32" height="32" alt="Instagram"></a>
        <a href="https://twitter.com/your-page" style="margin: 0 5px;"><img src="https://path.to/twitter-icon.png" width="32" height="32" alt="Twitter"></a>
    </div>
    <?php
}
Order-Specific Email Hooks
These hooks allow you to add content to the body of the order emails, which is where you can provide the most value to the customer.
woocommerce_email_before_order_table
This hook executes right before the main order details table. It’s a prime location for a personalized thank-you message or important pre-order information.
Example: Add a Personalized Thank You Message
add_action( 'woocommerce_email_before_order_table', 'add_personalized_thank_you_message', 10, 4 );

function add_personalized_thank_you_message( $order, $sent_to_admin, $plain_text, $email ) {
    // Only for customer emails
    if ( $sent_to_admin ) {
        return;
    }

    $first_name = $order->get_billing_first_name();

    if ( $plain_text ) {
        echo "Hi " . $first_name . ",\n\nThank you for your order! We're getting it ready for you. Here are the details:\n\n";
    } else {
        echo '<h2>Hi ' . $first_name . ',</h2>';
        echo '<p>Thank you for your order! We appreciate your business and are excited to get your items to you. You can find the details of your purchase below.</p>';
    }
}
woocommerce_email_after_order_table
As the name suggests, this hook fires immediately after the order details table. It’s perfect for upselling, cross-selling, providing care instructions, or sharing a discount code for a future purchase.
Example: Add a Coupon Code for a Future Purchase
add_action( 'woocommerce_email_after_order_table', 'add_next_purchase_coupon', 10, 4 );

function add_next_purchase_coupon( $order, $sent_to_admin, $plain_text, $email ) {
    // Only for the 'Completed Order' email sent to the customer
    if ( ! $sent_to_admin && $email->id === 'customer_completed_order' ) {
        $coupon_code = 'THANKYOU15'; // Make sure this coupon exists in WooCommerce

        if ( $plain_text ) {
            echo "\n\nAs a thank you, use code " . $coupon_code . " for 15% off your next order!";
        } else {
            echo '<div style="margin-top: 30px; padding: 20px; background-color: #f7f7f7; border: 1px dashed #ccc; text-align: center;">';
            echo '<h3>A Gift For You!</h3>';
            echo '<p>As a special thank you for your purchase, please enjoy 15% off your next order with the code below.</p>';
            echo '<p style="font-size: 18px; font-weight: bold; color: #555;">' . $coupon_code . '</p>';
            echo '</div>';
        }
    }
}
woocommerce_email_order_details
This hook gives you more granular control within the order table itself. It runs after the main order details have been output but before the closing tags of the section. It can be used to add extra details about the order as a whole.
Example: Display the Payment Method Used
add_action( 'woocommerce_email_order_details', 'display_payment_method_in_email', 5, 4 );

function display_payment_method_in_email( $order, $sent_to_admin, $plain_text, $email ) {
    $payment_method_title = $order->get_payment_method_title();

    if ( $payment_method_title ) {
        if ( $plain_text ) {
            echo "\nPayment Method: " . $payment_method_title;
        } else {
            echo '<p><strong>Payment Method:</strong> ' . $payment_method_title . '</p>';
        }
    }
}
woocommerce_email_customer_details
This hook fires after the customer’s billing and shipping addresses. It’s a great place to add extra customer-related information, like a VAT number or a note about their account.
Example: Add a Link to the “My Account” Page
add_action( 'woocommerce_email_customer_details', 'add_my_account_link_to_emails', 25, 4 );

function add_my_account_link_to_emails( $order, $sent_to_admin, $plain_text, $email ) {
    if ( ! $sent_to_admin && is_user_logged_in() ) {
        if ( $plain_text ) {
            echo "\n\nYou can view your order details and manage your account here: " . wc_get_page_permalink( 'myaccount' );
        } else {
            echo '<p>You can view your past orders, manage your addresses, and more in your <a href="' . esc_url( wc_get_page_permalink( 'myaccount' ) ) . '">My Account</a> area.</p>';
        }
    }
}
woocommerce_email_order_meta
This hook allows you to add custom meta data to the order emails. It’s often used to display information collected from custom checkout fields.
Example: Display a Custom Checkout Field (e.g., “Delivery Instructions”)
First, you would need a custom field at checkout. Let’s assume you’ve created one with the meta key _delivery_instructions.
add_action( 'woocommerce_email_order_meta', 'add_delivery_instructions_to_emails', 10, 4 );

function add_delivery_instructions_to_emails( $order, $sent_to_admin, $plain_text, $email ) {
    $delivery_instructions = get_post_meta( $order->get_id(), '_delivery_instructions', true );

    if ( ! empty( $delivery_instructions ) ) {
        if ( $plain_text ) {
            echo "\n\nDelivery Instructions: " . $delivery_instructions;
        } else {
            echo '<h3>Delivery Instructions</h3>';
            echo '<p>' . wp_kses_post( $delivery_instructions ) . '</p>';
        }
    }
}
Filter Hooks: Modifying Email Data
Filter hooks are essential for changing the default content and behavior of WooCommerce emails. Remember, any function attached to a filter must return a value.
Modifying Email Recipients
One of the most common requirements is to send order notifications to additional people, such as a supplier, a warehouse manager, or an accountant.
The hooks for this follow a consistent pattern: woocommerce_email_recipient_{email_id}.
woocommerce_email_recipient_new_orderwoocommerce_email_recipient_cancelled_orderwoocommerce_email_recipient_failed_orderwoocommerce_email_recipient_customer_completed_order(Note: Modifying the customer email recipient should be done with caution).
Example: Add a BCC Recipient to New Order Emails
This example sends a blind carbon copy of the “New Order” email to the accounting department.
add_filter( 'woocommerce_email_recipient_new_order', 'add_bcc_recipient_for_new_orders', 10, 2 );

function add_bcc_recipient_for_new_orders( $recipient, $order ) {
    // Add your BCC email address here
    $bcc_email = '[email protected]';
    $recipient .= ', bcc:' . $bcc_email;

    return $recipient;
}
Example: Send New Order Emails to Different Addresses Based on Product Category
This advanced example demonstrates sending the new order notification to a specific supplier if the order contains a product from their category.
add_filter( 'woocommerce_email_recipient_new_order', 'conditional_supplier_email_recipient', 10, 2 );

function conditional_supplier_email_recipient( $recipient, $order ) {
    if ( ! $order instanceof WC_Order ) {
        return $recipient;
    }

    $items = $order->get_items();
    $supplier_a_email = '[email protected]';
    $supplier_b_email = '[email protected]';

    $send_to_supplier_a = false;
    $send_to_supplier_b = false;

    foreach ( $items as $item ) {
        $product_id = $item->get_product_id();
        if ( has_term( 'supplier-a-category', 'product_cat', $product_id ) ) {
            $send_to_supplier_a = true;
        }
        if ( has_term( 'supplier-b-category', 'product_cat', $product_id ) ) {
            $send_to_supplier_b = true;
        }
    }

    if ( $send_to_supplier_a ) {
        $recipient .= ',' . $supplier_a_email;
    }
    if ( $send_to_supplier_b ) {
        $recipient .= ',' . $supplier_b_email;
    }

    return $recipient;
}
Modifying Email Subjects and Headings
Personalizing the subject line and heading can significantly improve open rates and brand perception. The hooks for these also follow a predictable pattern:
woocommerce_email_subject_{email_id}woocommerce_email_heading_{email_id}
Example: Personalize the “Completed Order” Subject Line
add_filter( 'woocommerce_email_subject_customer_completed_order', 'personalize_completed_order_subject', 10, 2 );

function personalize_completed_order_subject( $subject, $order ) {
    $first_name = $order->get_billing_first_name();
    // The default subject is "Your {site_title} order is now complete"
    // Let's change it to be more personal.
    $new_subject = sprintf( 'Great news, %s! Your %s order has shipped!', $first_name, get_bloginfo( 'name' ) );

    return $new_subject;
}
Example: Customize the “New Order” Heading for Admins
add_filter( 'woocommerce_email_heading_new_order', 'customize_admin_new_order_heading', 10, 2 );

function customize_admin_new_order_heading( $heading, $order ) {
    // The default is "New customer order"
    $new_heading = sprintf( 'New Order (#%s) - Total: %s', $order->get_order_number(), $order->get_formatted_order_total() );

    return $new_heading;
}
Modifying Email Content and Styles
For more advanced content manipulation, you can use filters.
woocommerce_email_get_content_{email_id}
This filter allows you to completely override the content of a specific email. This is a powerful but blunt instrument. Use it with care, as you will be responsible for generating all the HTML content.
woocommerce_email_styles
This filter gives you control over the inline CSS styles applied to WooCommerce emails. You can use it to change colors, fonts, and spacing to better match your brand identity.
Example: Change the Primary Color of Emails
add_filter( 'woocommerce_email_styles', 'change_woocommerce_email_colors', 10, 2 );

function change_woocommerce_email_colors( $css, $email ) {
    // Your brand's primary color
    $brand_color = '#7A5CFA';

    // Find and replace the default WooCommerce green color
    $css = str_replace( '#7f54b3', $brand_color, $css );

    return $css;
}
Putting It All Together: Conditional Logic
The true power of hooks is unlocked when you combine them with conditional logic. This allows you to create highly targeted and relevant email customizations. You can use any data from the $order object to create your conditions.
Here are a few common conditional checks:
- By Payment Gateway:
$order->get_payment_method() - By Shipping Method:
$order->get_shipping_method() - By Order Total:
$order->get_total() - By Product/Category: Loop through
$order->get_items()as shown in a previous example.
Example: Add BACS/Bank Transfer Details Only When Needed
This example uses an action hook to add bank transfer details to the “Order on-hold” email, but only if the customer selected that specific payment method.
add_action( 'woocommerce_email_before_order_table', 'add_bank_details_for_bacs_orders', 10, 4 );

function add_bank_details_for_bacs_orders( $order, $sent_to_admin, $plain_text, $email ) {
    // Only for 'customer_on_hold_order' email and for the customer
    if ( $sent_to_admin || $email->id !== 'customer_on_hold_order' ) {
        return;
    }

    // Only for 'bacs' payment method
    if ( $order->get_payment_method() === 'bacs' ) {
        if ( $plain_text ) {
            echo "To complete your order, please make a payment to the following bank account:\nAccount Name: Your Company\nAccount Number: 12345678\nSort Code: 12-34-56\nPlease use your Order ID as the payment reference.";
        } else {
            echo '<h2>Payment Instructions</h2>';
            echo '<p>Thank you for your order. To finalize your purchase, please transfer the total amount to our bank account using the details below. Please use your Order ID as the payment reference.</p>';
            echo '<ul>';
            echo '<li><strong>Account Name:</strong> Your Company</li>';
            echo '<li><strong>Account Number:</strong> 12345678</li>';
            echo '<li><strong>Sort Code:</strong> 12-34-56</li>';
            echo '</ul>';
        }
    }
}
Troubleshooting Common Issues
When working with PHP and hooks, you might encounter a few issues.
- The White Screen of Death: This usually means a fatal PHP error. Check your code for syntax errors like missing semicolons or brackets. If you have access to your server’s error logs, they will pinpoint the exact problem.
- Changes Not Appearing:
- Caching: Clear all levels of caching—your browser, any caching plugins, and your hosting provider’s cache.
- Hook Priority: Another function might be running after yours and overwriting your changes. Try increasing the priority of your hook (the number in the
add_actionoradd_filtercall). A lower number runs earlier. For example,add_action( 'hook_name', 'your_function', 5 );will run before the default priority of 10. - Wrong Hook: Double-check that you are using the correct hook for the specific email and location you want to modify.
Conclusion: Taking Control of Your Communications
Mastering WooCommerce email hooks is a powerful skill for any web professional. It allows you to move beyond the default templates and create a truly branded and effective communication strategy for your clients’ stores. By using a combination of action and filter hooks, you can add valuable information, reinforce brand identity, and ultimately improve the customer experience.
While manually coding these customizations provides ultimate flexibility, it’s also true that managing dozens of snippets can become complex. For projects requiring extensive and dynamic email workflows, a dedicated email customization tool can provide a more streamlined interface, often with visual builders and pre-built logic, simplifying the entire process. The key is to choose the right approach for the project’s needs, and now, with a deep understanding of hooks, you have the power to do just that.
