For web creators, this isn’t a threat; it’s the single biggest opportunity to expand your services, demonstrate undeniable value, and build long-term, profitable client partnerships. This guide explores ten essential automation workflows to help you do just that.
The Web Creator’s Opportunity: Why Marketing Automation is Your Next Big Service Offering
For years, our job was to build the store. Once launched, the client would often hire a separate marketing agency or try to piece together various tools to handle email, SMS, and promotions. This approach is quickly becoming outdated.
Moving Beyond the Build to Establish Long-Term Value
The project-based cycle of build, launch, and handoff leaves recurring revenue on the table. By offering marketing automation services, you shift from being a one-time contractor to an indispensable growth partner. You’re no longer just building the platform; you’re helping your client use it to make money. This deepens the relationship and makes your services incredibly sticky. You provide ongoing value that clients can see directly in their sales reports.
The Problem with Disconnected Tools
Why haven’t more web creators embraced this? Frankly, the tools have been the problem. Cobbling together a non-native email service, a separate SMS platform, and other marketing plugins creates a tangled mess. This leads to several headaches:
- Integration Friction: You spend hours wrestling with APIs, dealing with data that won’t sync correctly between WordPress and your marketing platform, and troubleshooting plugin conflicts.
- Complexity: Traditional marketing automation platforms can be intimidating, built with enterprise-level features that overwhelm small business owners and the web creators who support them.
- Slow Performance: Each external script and connection can add bloat, slowing down the very site you worked so hard to optimize.
The Power of a Native Solution
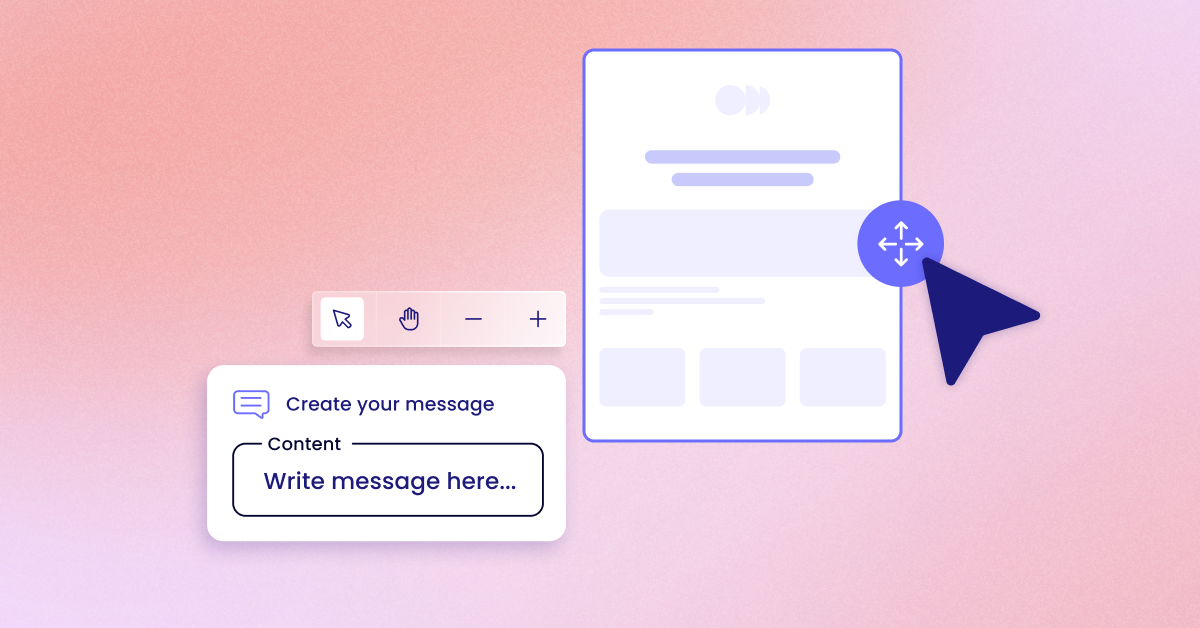
This is where a WordPress-native communication toolkit changes the game. Imagine managing email campaigns, SMS messages, and complex automation flows directly from the WordPress dashboard you already know.

Send by Elementor is designed specifically for this reality. It’s an all-in-one toolkit that integrates Email, SMS, automation, segmentation, and analytics directly into WordPress and WooCommerce. Because it’s truly WordPress-Native, it eliminates the common friction points. There are no complex APIs to manage or data sync issues to resolve. For web creators, this means you can implement powerful marketing services for your clients without the steep learning curve or technical headaches, transforming your service offering and unlocking those coveted recurring revenue streams.
Let’s dive into ten specific workflows you can build to drive incredible results for your clients.
1. The Welcome Series: Making a Strong First Impression
A welcome series is an automated sequence of messages sent to new subscribers or customers. It’s your client’s first real conversation with them, setting the tone for the entire relationship.
Why This Workflow Matters
First impressions are everything. A welcome series does more than just say “thanks for signing up.” It’s a strategic tool to onboard new contacts, educate them about the brand, and guide them toward their first purchase. With rising customer acquisition costs, making the most of every new lead is critical. In fact, 60% of consumers say they’ll become repeat purchasers after a personalized shopping experience, and the welcome series is your first chance to deliver that personalization.
This is also a crucial moment for a key eCommerce strategy: viewing data as a value exchange. You can tell subscribers that in return for their data (their email or phone number), you’ll provide them with valuable content, exclusive offers, and a better shopping experience.
Key Components & Setup
- Trigger: A user subscribes to a newsletter, creates an account, or makes their first purchase.
- Actions: A sequence of emails and potentially an SMS message sent over several days.
- Logic: Use time delays between messages to avoid overwhelming the user. You can also use segmentation to send slightly different messages based on how they signed up (e.g., newsletter form vs. post-purchase).
Step-by-Step Implementation
Using a native toolkit like Send by Elementor, setting this up is straightforward within the WordPress dashboard.
- Create a New Automation Flow: Navigate to the automation section and select a “Welcome Series” template or start from scratch.
- Set the Trigger: Choose the trigger, such as “User Subscribes” via an Elementor form or “Order Completed” for a first-time buyer in WooCommerce.
- Design Email #1 (Sent Immediately): This is the instant confirmation. Use the drag-and-drop builder to create a visually appealing email.
- Content: Welcome them, deliver the promised discount code (if offered), and briefly restate the brand’s core mission.
- Add a Time Delay: Set a “Wait” period of 1 or 2 days.
- Design Email #2 (Brand Story & Social Proof):
- Content: Share the brand’s origin story. Who are the people behind the products? Include links to your most active social media channels. You can feature a few top-rated product reviews here to build trust.
- Add Another Time Delay: Set a “Wait” period of 2 days.
- Design Email #3 (Product Showcase):
- Content: Highlight best-selling products or categories. If you have data on what the user viewed before subscribing, you can use that to personalize this email.
- Activate the Flow: Once you’re happy with the sequence, turn it on. The system will handle the rest.
Practical Tips & Best Practices
- Offer an Incentive: A 10% discount or free shipping for new subscribers is a powerful motivator.
- Set Expectations: Let users know what kind of content you’ll be sending and how often.
- Keep it Focused: Each email should have one clear call-to-action (CTA), whether it’s “Shop Now,” “Follow Us,” or “Read Our Story.”
Potential Challenges
The biggest challenge is message fatigue. Sending too many emails too quickly can lead to unsubscribes. Spacing them out over 3-5 days is a good starting point. Test different timings to see what works best for your client’s audience.
Measuring Success
Inside the Send by Elementor dashboard, you can track the performance of your welcome series in real-time. Show your client the open rates, click-through rates, and most importantly, the revenue attribution. The analytics will clearly connect this automation flow to the sales it generates, making it easy to demonstrate your value.
2. The Abandoned Cart: Recovering Lost Revenue
An abandoned cart workflow automatically sends reminders to shoppers who add items to their cart but leave the site without completing the purchase.
Why This Workflow Matters
Cart abandonment is a massive issue for eCommerce stores. The average abandonment rate is nearly 70%, meaning 7 out of every 10 shoppers leave without buying. That’s a staggering amount of potential revenue left on the table. A simple, automated reminder can be the nudge a customer needs to complete their purchase, making this one of the highest ROI automations you can implement for a client.
Key Components & Setup
- Trigger: A user with a known email address (either logged in or entered at checkout) adds an item to their cart and leaves the site.
- Actions: A series of 2-3 emails and/or an SMS message.
- Logic: The sequence is timed to deploy within hours of abandonment, with follow-ups over the next day or two if the purchase still isn’t complete.
Step-by-Step Implementation
Send by Elementor includes pre-built automation templates for abandoned carts, which simplifies this process immensely.
- Select the Abandoned Cart Flow: In the automation builder, choose the pre-built workflow for WooCommerce.
- Configure the Trigger: The trigger is already set to “Cart is Abandoned.” You can typically configure the time delay, with 1 hour being a common starting point.
- Customize Message #1 (1 Hour After Abandonment):
- Content: This should be a gentle reminder. Use a subject line like “Did you forget something?” The email should dynamically pull in the product(s) left in the cart, including images, names, and prices.
- Add a Time Delay: Set a “Wait” period, for example, 23 hours.
- Customize Message #2 (24 Hours After Abandonment):
- Content: This message can introduce a bit of urgency or offer help. Subject lines like “Your cart is about to expire” work well. You can also include a link to customer support or an FAQ page in case they had a question that prevented them from buying.
- Add Another Time Delay (Optional): Wait another 24-48 hours.
- Customize Message #3 (48-72 Hours After Abandonment):
- Content: This is your final attempt and where you might offer an incentive. A subject line like “A special offer just for you” can be effective. Include a small discount code (e.g., 10% off) to encourage completion.
- Activate the Flow: The system will now automatically track abandoned carts and send your messages.
Practical Tips & Best Practices
- Include Product Images: Visually reminding shoppers of what they left behind is very effective.
- Use a Clear CTA: The button should say “Return to Cart” or “Complete My Order” and link directly back to their pre-filled cart.
- Try SMS: For the first reminder, an SMS can be incredibly effective due to its immediacy. About 90% of text messages are read within three minutes. Send by Elementor’s toolkit lets you add SMS steps right into your flow.
Potential Challenges
The main challenge is getting the user’s email address. The automation can only trigger for logged-in users or those who have entered their email on the checkout page. Optimizing the checkout process to capture the email early is a key strategy.
Measuring Success
The success of this workflow is easy to measure. The analytics dashboard will show you exactly how much recovered revenue the automation has generated. Presenting your client with a statement like, “This month, the abandoned cart flow we set up recovered $5,000 in lost sales,” is a powerful way to prove your worth.
3. Post-Purchase Follow-Up & Review Request
This workflow automatically follows up with customers after they receive their order to thank them, provide helpful information, and ask for a product review.
Why This Workflow Matters
The customer relationship doesn’t end at the purchase; it’s just beginning. A post-purchase follow-up shows the client cares about the customer’s experience. More importantly, it’s the perfect time to generate social proof.
Product reviews are incredibly influential. An overwhelming 93% of U.S. consumers state that reviews influence their purchasing decisions. Furthermore, consumers are 186% more likely to buy something after reading reviews. By automating the review request process, you can systematically build a library of user-generated content that will boost conversions across the entire site.
Key Components & Setup
- Trigger: An order is marked as “Completed” or “Shipped” in WooCommerce.
- Actions: A series of 1-2 emails.
- Logic: The timing is crucial. You want to ask for a review after the customer has had enough time to receive and use the product.
Step-by-Step Implementation
- Create a New Automation Flow: Title it “Post-Purchase & Review Request.”
- Set the Trigger: Use the WooCommerce trigger “Order Status Changed to Completed.”
- Add a Time Delay: This is the most important step. Calculate the average shipping time plus a few days for the customer to try the product. A 14-day delay is a good starting point.
- Design Email #1 (Review Request):
- Content: Start by thanking them again for their order. Ask a simple question like, “How are you enjoying your [Product Name]?” Make it easy for them to leave a review with a clear CTA button that links directly to the product page.
- Optional – Add a Reminder: If no review is left after a few days, you can send a gentle follow-up.
- Activate the Flow: The system will now automatically solicit reviews from every customer.
Practical Tips & Best Practices
- Make it Easy: The less friction, the better. A direct link to the review form on the product page is essential.
- Ask Guiding Questions: Instead of just “Leave a review,” prompt them with questions like “What did you like most?” or “How did it fit?” to get more detailed feedback.
- Offer an Incentive (Carefully): Offering a small discount on a future purchase in exchange for a review can boost submission rates. Be transparent that the incentive is for leaving a review, not just for a positive review, to maintain authenticity.
Potential Challenges
Asking for a review too early is a common mistake. If the customer hasn’t received the product yet, the email is useless and annoying. Asking too late means they may have forgotten the initial excitement. Testing the time delay is key.
Measuring Success
Success is measured in the number of new reviews generated. You can track this by comparing the rate of reviews before and after activating the workflow. As reviews accumulate, you can also point to an increase in the conversion rate on those product pages, showing the client how this user-generated content is directly impacting sales.
4. Customer Win-Back & Re-Engagement
A win-back or re-engagement campaign is an automated workflow that targets customers who haven’t purchased in a while, aiming to bring them back to the store.
Why This Workflow Matters
It’s almost always cheaper to retain an existing customer than to acquire a new one. Over time, some customers will naturally lapse. A proactive re-engagement strategy can reactivate a significant portion of this group. This is about building
emotional loyalty—showing customers the brand misses them and wants them back. For many consumers, it’s no longer just about the money; they are more likely to spend more on a brand they feel emotionally connected to.
Key Components & Setup
- Trigger: A customer has not made a purchase in a specific number of days (e.g., 90, 180).
- Actions: A series of 2-3 emails, possibly including a special offer.
- Logic: The workflow uses customer purchase history to identify lapsed customers and entice them back with targeted messaging.
Step-by-Step Implementation
- Create a New Audience Segment: In your contact management tool, create a dynamic segment of customers whose “Last Order Date” is more than 90 days ago but less than 365 days ago. You want to target lapsed customers, not lost ones.
- Create a New Automation Flow: Title it “Customer Win-Back.”
- Set the Trigger: The trigger will be “Contact is Added to a Segment” and choose the “Lapsed Customers” segment you just created.
- Design Email #1 (We Miss You):
- Content: The tone should be friendly. Use a subject line like “Is everything okay?” or “We miss you, [First Name]!” Remind them what’s new at the store since their last visit.
- Add a Time Delay: Wait for 7-10 days.
- Design Email #2 (Exclusive Offer):
- Content: If the first email didn’t work, now is the time for an incentive. Offer a compelling discount, like “20% off your next order, just for you.” Create a sense of exclusivity.
- Add a Final Time Delay: Wait another 14 days.
- Design Email #3 (Last Chance / Feedback Request):
- Content: This is the final attempt. Let them know the exclusive offer is expiring. You can also ask for feedback: “Was there a reason you haven’t been back? We’d love to know how we can improve.” This can provide valuable insights even if it doesn’t result in a sale.
- Activate the Flow: The automation will now continuously monitor for lapsed customers and try to win them back.
Practical Tips & Best Practices
- Personalize the Content: Mention their name and, if possible, reference their past purchases to show you remember them.
- Showcase What’s New: Highlight new products, features, or content that has been added since their last visit.
- Clean Your List: If a customer doesn’t re-engage after the full sequence, you might consider moving them to a “sunset” list that receives very infrequent emails, or removing them entirely to improve deliverability metrics.
Potential Challenges
The main risk is that the discount offer devalues the brand or trains customers to wait for a deal. To mitigate this, make the offer feel personal and exclusive, not like a site-wide sale.
Measuring Success
Track the re-engagement rate (how many people from the segment make a purchase) and the revenue generated from this specific workflow. Showing your client that you’ve reactivated hundreds of old customers and generated thousands in sales is a clear win.
5. VIP & Customer Loyalty Automation
This workflow automatically identifies your client’s best customers and treats them like VIPs, offering exclusive perks, early access, and special recognition.
Why This Workflow Matters
Loyalty is the bedrock of sustainable eCommerce growth. While attracting new customers is important, your client’s most profitable segment is often their small group of loyal, repeat buyers. Nurturing this group is essential. Research shows that
81% of consumers want to form a relationship with brands. A VIP automation provides the framework to build that relationship, making your best customers feel valued and encouraging them to spend even more. This fosters the emotional connection that turns satisfied shoppers into passionate brand advocates.
Key Components & Setup
- Trigger: A customer meets certain criteria, such as total lifetime spend (e.g., over $500) or number of orders (e.g., 5 or more).
- Actions: An email sequence that welcomes them to the VIP program, outlines their perks, and sends them exclusive offers over time.
- Logic: The system uses dynamic segmentation based on WooCommerce purchase data to automatically add (or remove) customers from the VIP tier.
Step-by-Step Implementation
- Define Your VIP Criteria: Decide with your client what qualifies a customer as a VIP. Common metrics are:
- Lifetime spend (e.g., >$500)
- Total number of orders (e.g., >5)
- A combination of both.
- Create a VIP Audience Segment: Use the contact management tools in Send by Elementor to create a dynamic segment based on your chosen criteria.
- Create a “Welcome to VIP” Automation Flow:
- Trigger: “Contact is Added to a Segment” (your new VIP segment).
- Action (Email #1): Send an email immediately. The subject line should be exciting: “You’re In! Welcome to the VIP Club.”
- Content: Congratulate them on reaching VIP status. Clearly list their new perks (e.g., free shipping on all orders, early access to new products, a dedicated customer service line).
- Create Separate Automations for Ongoing Perks:
- Early Access Flow: When a new product is about to launch, send an email to the VIP segment 24-48 hours before anyone else.
- Exclusive Offer Flow: On a regular basis (e.g., quarterly), send the VIP segment a special discount or gift that is not available to the general public.
Practical Tips & Best Practices
- Make the Perks Meaningful: A 5% discount isn’t very exciting. Think bigger: free shipping, early access, exclusive products, or even a birthday gift.
- Foster a Community: You can create a private Facebook group or a special section of the website accessible only to VIPs.
- Use Tiers: For more advanced setups, you can create multiple tiers (e.g., Silver, Gold, Platinum) with progressively better rewards to encourage customers to climb the loyalty ladder.
Potential Challenges
The main challenge is ensuring the perks are valuable enough to feel exclusive without hurting the business’s bottom line. It’s a balancing act. Also, be sure the criteria are fair and clearly communicated to avoid customer frustration.
Measuring Success
Success is measured by tracking the behavior of the VIP segment. Compare their average order value (AOV), purchase frequency, and lifetime value against non-VIP customers. The analytics should demonstrate that the VIP program is creating more profitable, more engaged customers.
6. Product Recommendation & Cross-Sell
This automated workflow sends targeted product recommendations to customers based on their past purchase history.
Why This Workflow Matters
Personalization drives sales. When you can show a customer products that are highly relevant to what they’ve already bought, the chances of a repeat purchase skyrocket. This is far more effective than sending generic, mass-market emails. A customer who bought a coffee machine is a perfect candidate for an email about premium coffee beans. This type of targeted cross-selling increases average order value and customer lifetime value.
Key Components & Setup
- Trigger: A customer purchases a specific product or a product from a specific category.
- Actions: A timed email sent a week or two after the purchase, suggesting complementary products.
- Logic: The workflow relies heavily on segmentation based on purchase data.
Step-by-Step Implementation
- Identify Cross-Sell Opportunities: With your client, map out logical product pairings.
- If someone buys a tent, recommend a sleeping bag.
- If someone buys a dress, recommend matching shoes.
- If someone buys a particular brand of dog food, recommend treats from the same brand.
- Create Product-Specific Audience Segments: For each opportunity, create a segment. For example, “Customers who bought Product X.”
- Create a New Automation Flow for Each Opportunity: Title it “Cross-Sell for Product X.”
- Trigger: “Order Completed” where the order contains Product X.
- Add a Time Delay: Wait 7-14 days. This gives them time to receive and appreciate their initial purchase.
- Design the Cross-Sell Email:
- Content: Start by asking how they’re enjoying their initial purchase. Then, transition to the recommendation. For example: “To get the most out of your new tent, check out our best-selling sleeping bags.” Showcase 2-3 recommended products with clear images and links.
- Activate the Flow: Repeat this process for your top 5-10 cross-sell opportunities.
Practical Tips & Best Practices
- Don’t Be Pushy: Frame the email as helpful advice, not just a sales pitch.
- Use Dynamic Content: Advanced tools can automatically populate emails with products from a “complementary” category, reducing the need to build dozens of separate flows.
- Look at “Customers Also Bought” Data: Your WooCommerce data can reveal unexpected cross-sell opportunities.
Potential Challenges
This workflow requires a good understanding of the product catalog and customer behavior. If the recommendations are poor or irrelevant, it can feel spammy. Start with the most obvious and logical pairings first.
Measuring Success
Track the click-through rate on the recommendation emails and, most importantly, the revenue generated by this specific automation. This provides another clear data point to show your client how your marketing efforts are directly contributing to sales growth.
7. New Product or Content Announcement
This workflow leverages your customer segments to announce new products or blog posts to the audiences most likely to be interested.
Why This Workflow Matters
Not every announcement is relevant to every customer. Blasting your entire list with every update can lead to email fatigue and unsubscribes. By using segmentation, you can deliver news that feels personal and relevant, dramatically increasing engagement. A customer who has only ever purchased men’s clothing doesn’t need to be the first to know about a new line of women’s dresses. Targeted announcements respect the customer’s inbox and lead to better results.
Key Components & Setup
- Trigger: A manual trigger initiated by you or your client when there is a new product or blog post to promote.
- Actions: A single, targeted email sent to a specific audience segment.
- Logic: The power of this workflow comes from the quality of your segments.
Step-by-Step Implementation
- Ensure Your Segments are in Place: This workflow relies on having well-defined audience segments based on purchase history, Browse behavior, or stated interests. Examples include:
- Customers who purchased from “Category A”
- Customers interested in “Topic B” (based on a survey or quiz)
- VIP Customers
- New Subscribers
- Design an Announcement Template: Using the email builder, create a flexible template for new product and content announcements. This saves time later.
- Launch the Campaign: When your client has a new product, follow these steps:
- Craft the Email: Duplicate your template and add the content for the new announcement.
- Select the Audience: This is the key step. Instead of sending to “All Contacts,” choose the most relevant segment. For a new hiking boot, you would select the segment of customers who have previously purchased outdoor gear.
- Send or Schedule: Launch the campaign immediately or schedule it for a specific time.
Practical Tips & Best Practices
- Write Compelling Subject Lines: Be specific. Instead of “New Product,” try “Our New Waterproof Hiking Boot is Here.”
- Use High-Quality Visuals: The announcement should feature professional photos or videos of the new product.
- Build Anticipation: For a major launch, you can create a mini-automation flow—a series of 2-3 teaser emails sent to a key segment in the days leading up to the launch.
Potential Challenges
This workflow is less “set-and-forget” than others and requires manual initiation. The main challenge is maintaining clean and accurate audience segments. Regularly review and update your segmentation criteria to ensure they remain relevant.
Measuring Success
For each campaign, track the open rate, click-through rate, and sales generated from that specific announcement. By comparing the results of a targeted send to a previous “batch and blast” send, you can easily demonstrate the value of intelligent segmentation to your client.
8. The Subscription Management Flow
For clients with subscription or “subscribe and save” models, this workflow helps manage the customer experience, reduce churn, and increase lifetime value.
Why This Workflow Matters
The subscription economy is booming, but it’s also evolving. Customers now expect flexibility. In 2025, successful subscriptions will feel more like
memberships, where the customer feels in control. An automated workflow can facilitate this by giving subscribers easy options to manage their orders. By allowing a customer to pause or skip an order instead of forcing them to cancel, you can dramatically reduce churn. One study showed that subscribers last
135% longer when they can skip an order.
Key Components & Setup
- Trigger: A subscription renewal date is approaching.
- Actions: A pre-renewal reminder email with options to manage the subscription.
- Logic: The email provides direct links to the customer’s account page where they can skip, delay, or swap products in their upcoming order.
Step-by-Step Implementation
- Integrate with a Subscription Plugin: Ensure your client is using a robust WooCommerce subscription plugin.
- Create a New Automation Flow: Title it “Upcoming Subscription Renewal.”
- Set the Trigger: The trigger will be based on the subscription renewal date. Set it to run, for example, 5 days before the renewal is processed.
- Design the Reminder Email:
- Content: The email should be clear and helpful. The subject line could be “Your upcoming [Product Name] shipment.”
- Body: Remind them what’s in their order and when it’s scheduled to ship.
- The Magic: Provide clear, bold links or buttons for key actions: “Skip This Shipment,” “Change Delivery Date,” and “Swap Products.” These should link directly to the relevant sections of their account page.
Practical Tips & Best Practices
- Offer a Swap: Allowing customers to swap a product in their next shipment for a different one is a powerful retention tool.
- Promote an Add-On: Use this email as an opportunity to cross-sell. Include a special offer to add a complementary product to their next shipment with one click.
- Gather Feedback: If a customer does choose to cancel, trigger a final email asking for their reason. This feedback is invaluable for improving the subscription program.
Potential Challenges
This workflow has a higher technical dependency on the subscription plugin being used. You need to ensure the links in the email go to the correct, user-friendly pages for managing the subscription. A clunky user interface on the account page can defeat the purpose of the workflow.
Measuring Success
The primary metric for success here is the churn rate. Track the percentage of subscribers who cancel each month. By implementing this flexible management flow, you should be able to demonstrate a significant reduction in churn to your client. You can also track the uptake of add-on offers to show additional revenue generation.
9. Lead Nurturing for Non-eCommerce Clients
Marketing automation isn’t just for WooCommerce. For your clients who are service providers, consultants, or B2B businesses, a lead nurturing flow can be incredibly valuable.
Why This Workflow Matters
Not everyone who fills out a contact form is ready to buy. A lead nurturing workflow educates potential clients over time, building trust and keeping the brand top-of-mind until the lead is ready to make a decision. This is a perfect service offering for clients who need customer communication features but don’t run a traditional online store. It allows you to use the same powerful toolkit to serve a broader range of clients.
Key Components & Setup
- Trigger: A user submits a form to download a lead magnet (e.g., an e-book, a webinar, a case study).
- Actions: A sequence of emails that provide additional value and gradually introduce the company’s services.
- Logic: The workflow delivers helpful content first and saves the sales pitch for later, building a relationship based on expertise and trust.
Step-by-Step Implementation
- Create a Lead Magnet: Work with your client to create a valuable piece of content that their ideal customer would want (e.g., “5 Mistakes to Avoid When…”).
- Build a Landing Page: Use Elementor to build a landing page for the lead magnet with a form to capture names and email addresses.
- Create a New Automation Flow: Title it “Lead Nurturing.”
- Set the Trigger: The trigger is the submission of your lead magnet form.
- Design Email #1 (Immediate Delivery):
- Content: Deliver the promised lead magnet. Keep it short and focused.
- Add a Time Delay: Wait 3-4 days.
- Design Email #2 (Related Content):
- Content: Provide another piece of helpful, related content, like a blog post or a short video. Don’t sell anything yet.
- Add a Time Delay: Wait another 3-4 days.
- Design Email #3 (Case Study/Testimonial):
- Content: Start to introduce the solution. Share a success story or testimonial from a past client that relates to the topic of the lead magnet.
- Add a Final Time Delay: Wait 5-7 days.
- Design Email #4 (The Soft Pitch):
- Content: Now you can make an offer. Invite them to a free consultation, a demo, or a strategy session. The call-to-action should be low-commitment.
Practical Tips & Best Practices
- Focus on Value: 90% of your content in this flow should be educational and helpful. Only 10% should be promotional.
- Keep it Relevant: Ensure every email in the sequence relates logically to the topic of the original lead magnet.
- Use a Clear Signature: Every email should come from a person at the company, not a generic “info@” address, to build a personal connection.
Potential Challenges
The biggest challenge is creating enough valuable content to fuel the workflow. This may require you to work closely with your client to write blog posts or create other resources.
Measuring Success
Success is measured by the number of leads who take the final call-to-action (e.g., book a consultation). You can track this by using a unique link in the final email. This shows the client a clear ROI on their content marketing efforts.
10. The Flash Sale or Holiday Promotion
This workflow uses the power of both email and SMS to create urgency and drive conversions during a short-term promotion like a flash sale, Black Friday, or a holiday event.
Why This Workflow Matters
During key shopping periods, inboxes are crowded and attention is scarce. A multi-channel approach is essential to cut through the noise. Combining email for rich, visual storytelling with SMS for immediate, attention-grabbing alerts creates a powerful one-two punch. Given that
global social media ad spend is projected to reach over $345 billion by 2029, organic channels like email and SMS are more important than ever for driving profitable sales.
Key Components & Setup
- Trigger: A manual trigger to launch the campaign at the start of the promotion.
- Actions: A coordinated sequence of emails and SMS messages sent over the course of the sale.
- Logic: The workflow builds anticipation, announces the launch, sends reminders, and gives a final “last chance” warning before the sale ends.
Step-by-Step Implementation
- Define the Promotion: With your client, decide on the offer, duration, and messaging for the sale.
- Create a Promotional Segment: Create a segment of all your engaged contacts who have agreed to receive marketing messages.
- Build the “Flash Sale” Automation Flow:
- Email #1 (24 Hours Before): “It’s Coming…” Build anticipation. Announce that a big sale is starting tomorrow, but don’t reveal the exact discount yet.
- Email #2 & SMS #1 (Sale Launch): “It’s Live!” Send a coordinated email and SMS message the moment the sale starts. The email can be visual and showcase the products. The SMS should be short and direct: “Our Black Friday Sale is LIVE! Get 30% off site-wide for 48 hours. Shop now: [Link]”.
- Email #3 (24 Hours In): “Halfway Through!” Send a reminder email halfway through the sale. You can showcase best-sellers or feature customer reviews.
- Email #4 & SMS #2 (Final Hours): “Last Chance!” Send a final email and SMS a few hours before the sale ends to create urgency. Use subject lines like “Ending Tonight!”
Practical Tips & Best Practices
- Get SMS Consent: You must have explicit consent from users to send them promotional text messages. Use pop-ups or checkout checkboxes to build your SMS list ahead of the sale.
- Keep SMS Short and Sweet: SMS is for urgency and alerts. Keep messages to the point and always include a direct link.
- Coordinate Timing: Ensure your email and SMS messages work together, not against each other. The Send by Elementor toolkit allows you to manage both channels in a single, unified flow.
Potential Challenges
The risk with promotional messaging is fatigue. If your client runs sales too often, they lose their impact. Use flash sales strategically for key moments, not every other week.
Measuring Success
This is all about the numbers. Track the total sales revenue, conversion rate, and average order value during the promotional period. The analytics dashboard will attribute sales directly to your email and SMS campaigns, providing a crystal-clear report of the campaign’s success for your client.
Conclusion: Your Path to Becoming a Growth Partner
These ten workflows are more than just marketing tactics; they are blueprints for transforming your business. By moving beyond the website build and into marketing automation, you stop being a temporary vendor and become an ongoing growth partner. You provide tangible, measurable results that directly impact your client’s bottom line.
This isn’t a small pivot; it’s a strategic evolution. It requires the right mindset and, just as importantly, the right tools. The complexity and fragmented nature of traditional marketing platforms have long been a barrier for web creators. But with the rise of powerful, WordPress-native toolkits like
Send by Elementor, that barrier is gone.
By leveraging a single, integrated platform to manage email, SMS, and automation directly within the WordPress environment you already master, you can deliver these sophisticated services efficiently and profitably. You can finally offer the ongoing value your clients need, build the recurring revenue streams your business deserves, and solidify your role as an indispensable expert in the digital world. The opportunity is right in front of you.


